RV Maintenance Tips
RV Maintenance is one of those things we all try to put off until we absolutely have to do it. There are some things that even when we finally get around to doing, most of us are doing wrong. There is one item in this article that I didn’t even know we had to do! The ice forming on the inside of one of our walls could have been avoided, and I’m going to tell you how.
It’s no secret by now that no matter what you spent on your RV, the craftsmanship could be better. That being said, they do twist and bounce a lot going down the road, which can lead to things loosening or shifting.

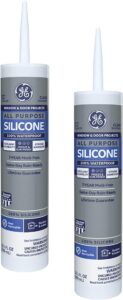
That exact scenario is what led to ice literally forming on the inside of our camper one January morning, and then having to remove the wall paneling and insulation. All of it could have been avoided with an 8 Dollar tube of silicone, if I had known it needed to be done.

Seal Your Windows And Doors
Check for leaks, often. One thing you can do to avoid a leak in the first place is to reseal your window frames and door. RV Windows are a sandwich style frame where the outside and inside squeeze the window opening and are held together with screws.
Over time the screws will loosen causing the frame to not squeeze the walls as tightly as they did before. Putting a small bead of clear silicone around the top and side of each exterior window frame and around your door can prevent water from getting inside your walls.
In our case when the window frame screws had loosened a bit, water got into the top of the window frame. It then ran down the inside of the wall, soaking the insulation and the inside and outside wall. When the cold January air came in, all of that water turned to ice. The frozen interior wall attracted moisture from the air to build more ice throughout the night.
The following morning is when we saw our new snow flake wall paper next to the couch. This led to several days of removing the interior wall panels. Then removing all of the insulation. Using fans for days to dry the exterior wall panel from the inside, and treating the mold that had apparently started growing inside the wall some time ago.
Checking Your RV Tire Pressure
Probably the most commonly overlooked regular maintenance task that we all should be doing. I’m guilty of it myself really. We have all been in a hurry to get where we are going for the day and just hit the road while saying “eh, they’re round. Let’s go“.
Since going full time one thing I have learned the hard way is that it is much better to waste a minute now than a day later. How long does it really take to check the tire pressure? Not very long at all. We have 6 tires on our RV and it takes me less than 5 minutes to manually check them all.
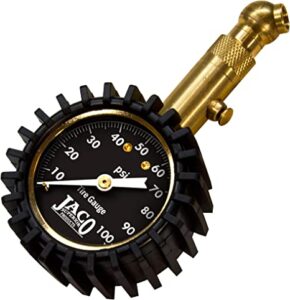
If we put it in park, we check them before we put it back in drive. That’s our current procedure, and it hasn’t ever once bitten us in the ass. I prefer to check my tires with a tire pressure gauge manually. For one reason I get to stretch my legs a little bit longer at the rest stop.
The other reason, is that I get a visual of every single tire every single time. I know guys that swear by their Tire Pressure Monitoring System (TPMS) and won’t travel without one. I’m not knocking them either.

Do You Need A TPMS
You should get an add on TPMS like the one pictured here and always have the peace of mind knowing your tires are the right pressure even while going down the road. They come in really handy if you run something over after your last manual check and have a tire starting to go down in pressure. You can catch it before it goes flat and blows out taking RV Body Panels with it.

What a TPMS can’t tell you is how much tread is left on your tire, if the tread is wearing evenly, or if there is a chunk missing out of the sidewall from that curb you scuffed going around the corner. Don’t forget to check the Inside sidewall too! Perhaps the best way to do is is with a TPMS and a manual inspection every time you stop.
Pro Tip: Check the pressure in your Spare Tire Too!
Did you know that RV Tires have an expiration date?
RV Tires have a date stamped on them when they are manufactured. Even if you only drive your RV to the campground on the other side of town twice a year, they are going to need to be replaced at some point. There are many opinions on how long they last, my opinion is about 5 years. The amount of sun exposure your RV tires get every year will affect this number.
Grease Your RV Wheel Bearings
Many of todays new Fifth Wheels and Travel Trailers come with an easy to grease wheel bearing system. Under the center cap of your wheel is a zerc fitting that you can pop a grease gun on and fill your bearings with fresh grease.
Most of us, IF we ever do grease our bearings, do it wrong. If you just pop the center cap off and pump some grease in there, sure it’s better than nothing, but it isn’t the right way to do it.
(Read: How To Improve Your RV Shower)
The right way to freshen up your wheel bearing grease it to jack up the axle until the tire can rotate. Then pop your grease gun onto the fitting. Next, while pumping the grease gun, continually rotate your tire, pumping until NEW grease starts to come out.
Don’t just stop when SOME grease comes out. Rotating the tire while greasing will avoid and dry spots or air pockets in the the bearings, as well as make sure new grease pushes all of the old grease out. You may need up to an entire tube of grease for each wheel, depending on how well its been done before you purchased your RV.


I love the Lucas Red N Tacky. We just did 9,500 miles on our last loop through the good ole USA, and with each freshen up of the grease, could feel an immediate difference in the rolling resistance of our trailer. You should be replacing your grease every 3,000 or so miles to keep everything rolling smooth.